Jump to content

Welcome to RennTech.org Community, Guest

There are many great features available to you once you register at RennTech.org
You are free to view posts here, but you must log in to reply to existing posts, or to start your own new topic. Like most online communities, there are costs involved to maintain a site like this - so we encourage our members to donate. All donations go to the costs operating and maintaining this site. We prefer that guests take part in our community and we offer a lot in return to those willing to join our corner of the Porsche world. This site is 99 percent member supported (less than 1 percent comes from advertising) - so please consider an annual donation to keep this site running.

Here are some of the features available - once you register at RennTech.org

  • View Classified Ads
  • DIY Tutorials
  • Porsche TSB Listings (limited)
  • VIN Decoder
  • Special Offers
  • OBD II P-Codes
  • Paint Codes
  • Registry
  • Videos System
  • View Reviews
  • and get rid of this welcome message

It takes just a few minutes to register, and it's FREE

Contributing Members also get these additional benefits:
(you become a Contributing Member by donating money to the operation of this site)

  • No ads - advertisements are removed
  • Access the Contributors Only Forum
  • Contributing Members Only Downloads
  • Send attachments with PMs
  • All image/file storage limits are substantially increased for all Contributing Members
  • Option Codes Lookup
  • VIN Option Lookups (limited)

Recommended Posts

Posted

My convertible top stopped working on my 2004 Boxster S. After researching the possible causes I discovered that the driver-side pushrod attached to the V-lever was bent and the plastic tip broken. The passenger side pushrod appeared intact. I replaced both sides with new pushrods and tips and made sure that the length of both were exact and the same as the pushrod on the passengers side. All seemed well and the mechanism attempted to raise and lower the top but the leading edge of the top would catch on the back of the driver-side rollbar during the raise operation. I can manually free the top so that it continues to raise but the operation ends and the motor stops when the leading edge of the top is about two inches from the windscreen latch point. Now what?

Posted

The overall length of your front pushrods is not set correctly.

First lengthen the driver's side pushrod incrementally by unscrewing the plastic ball cup by one full turn at a time. That should move the frame enough to clear the top of the driver's side rollbar. That should also have the effect of bringing the leading edge of the top closer to the horizontal upper part of the windshield frame.

If you don't get enough adjustment by that method, screw the plastic ball cup back to its original position and lengthen the pushrod by loosening the 10mm bolt with fat washer and pull the two sections apart incrementally before tightening that bolt again. This method will provide more gross adjustment than the finer adjustments provided by unscrewing the plastic ball cup one turn at a time.

Also, note that this is not strictly linear effect. Once you get past a certain length, the leading edge of the top will start to retract when it reaches its final position before latching.

Regards, Maurice.

Posted

Maurice,

I followed your suggestion but the effect did not solve the problem. Lengthening the pushrod, either by unscrewing the plastic ball cup or by way of the 10mm bolt only served to make the leading edge of the top finish it's movement closer to the horizontal upper part of the windshield frame than the other (passenger) side.

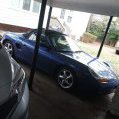
The original problem remains: when the button is pushed to raise the top the first movement that occurs is the clamshell rises to get out of the way. The next movement is the leading edge of the top moves forward and THEN up. The leading edge gets caught on the bottom of the back of the roll bar/screen and is stuck. It can only be manually freed. Once freed, the top continues it's closing motion without problem. I suspect that the issue has something to do with whatever process lifts the leading edge of the top from it's resting position. See attached photos. Thoughts?

Dan

Posted

Dan:

The photos did not post.

When you say the leading edge of the top gets caught on the bottom of the back of the roll bar, how much of the leading edge is actually under the back of the roll bar...In other words, how much (in inches) is the leading edge too far forward at that point?

Regards, Maurice.

Posted

I'm sorry the photos didn't post, maybe these will.

It's difficult to measure how far the leading edge is too far forward because it presses into the back of the roll bar but I would guess that the distance is an inch...more or less. The photos below show the top in it's resting position and then in it's stuck position.

Dan

Posted

Maurice,

Just in case the photos don't appear here I've uploaded them to my FB page so you can see them: https://www.facebook.com/home.php

Dan

Dan:

Could you post the photos on TinyPic or another image hosting website. I "unfriended" facebook a long time ago.

Also, I forgot to ask... Is the portion of the canvas that gets stuck under the rollbar the same on both edges (i.e., the left front corner of the leading edge and the right front corner), or is it more on one side than the other?

Regards, Maurice.

Posted (edited)

Dan:

I was able to see the photos on Tinypic. Thanks for posting them there.

It does not look like it needs a big adjustment, so you may actually be able to adjust the starting position of the top to clear the bottom of the roll bar.

Put the top in the service position and loosen (no need to remove them completely, just break them loose and go another 1/2 turn) the three 15mm(IIRC) bolts that hold the convertible top frame onto the body on each side. I would start with the side that is binding and then, if that doesn't work, also loosen the other side before making the adjustment and then tightening them down.

When the bolts are loose, have someone pull back hard on the underside of the frame and tighten one bolt, then test the top. If it fixes the problem, tighten the other two bolts on that side.

Here is a link to a DIY I wrote up on replacing the top and frame http://sites.google....frameona'97

Go to the Part I PDF, specifically to the text at pages 11 and 12 and the photos at page 12 and 15 for a good look at the location of the the bolts.

Good luck!

Regards, Maurice.

Edited by 1schoir
Posted

Maurice,

I followed the link you provided and downloaded PDF Parts 1 & 2. However, Part 1 only goes to page 16. Part 2 has pages 17-31 but the photo on page 20 is of the transmission and not the 3 bolts. If I'm right the bolts are shown on page 15 of Part 1 and the text indicates that they are 13mm. Please confirm that I am looking at the right photo and the bolt size is 13mm. Thanks.

Dan

Posted

Dan:

Sorry about that... you are looking at the correct area. The bolt sizes are definitely 13mm and the relevant text starts at the bottom of page 11 (after the parts list) and continues onto page 12, where the first photo of what you are looking for is posted. On page 15, there is another photo of the same area that also has some pertinent text.

BTW, you can probably ignore the phillips head screw depicted in the photo as that only applied to very early 986's. You should just be concerned with the three large bolts but double check to make sure there are no phillips head screws that would prevent you from moving the frame in any direction.

Also note that it takes a very tiny bit of adjustment back to produce the desired result and that you have to keep the pulling tension on it until you tighten at least one bolt.

Regards, Maurice.

Create an account or sign in to comment

You need to be a member in order to leave a comment

Create an account

Sign up for a new account in our community. It's easy!

Register a new account

Sign in

Already have an account? Sign in here.

Sign In Now
×
×
  • Create New...

Important Information

We have placed cookies on your device to help make this website better. You can adjust your cookie settings, otherwise we'll assume you're okay to continue.