Jump to content

Welcome to RennTech.org Community, Guest

There are many great features available to you once you register at RennTech.org
You are free to view posts here, but you must log in to reply to existing posts, or to start your own new topic. Like most online communities, there are costs involved to maintain a site like this - so we encourage our members to donate. All donations go to the costs operating and maintaining this site. We prefer that guests take part in our community and we offer a lot in return to those willing to join our corner of the Porsche world. This site is 99 percent member supported (less than 1 percent comes from advertising) - so please consider an annual donation to keep this site running.

Here are some of the features available - once you register at RennTech.org

  • View Classified Ads
  • DIY Tutorials
  • Porsche TSB Listings (limited)
  • VIN Decoder
  • Special Offers
  • OBD II P-Codes
  • Paint Codes
  • Registry
  • Videos System
  • View Reviews
  • and get rid of this welcome message

It takes just a few minutes to register, and it's FREE

Contributing Members also get these additional benefits:
(you become a Contributing Member by donating money to the operation of this site)

  • No ads - advertisements are removed
  • Access the Contributors Only Forum
  • Contributing Members Only Downloads
  • Send attachments with PMs
  • All image/file storage limits are substantially increased for all Contributing Members
  • Option Codes Lookup
  • VIN Option Lookups (limited)

Tool Pants

Moderators
  • Posts

    4,786
  • Joined

  • Last visited

  • Days Won

    6

Everything posted by Tool Pants

  1. Have your mechanic follow the 996 Porsche short shift instructions and he will not have to disturb the cable connector settings.
  2. What tool were you trying to use?
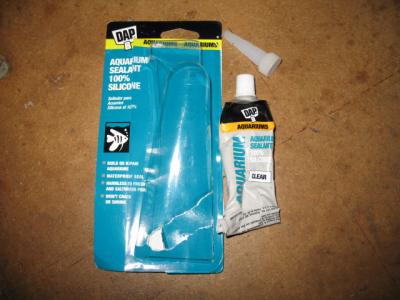
  3. I have not tired to seal a liner. Others on the message boards have and they used silicon. I used this stuff on my washing machine tub. Nothing special. Just a tube of silicon you can find at a hardware store.
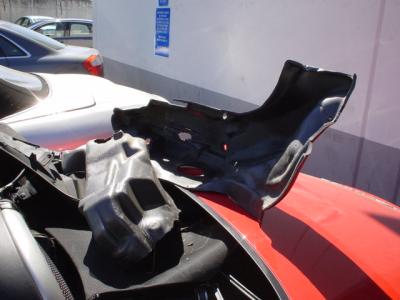
  4. I do not know anyone who has done this themselves since it is so uncommon for them to be damaged. Last year there was a car at my dealer that needed to have the foam liner replaced. I think Porsche calls the liner a drip pan or something like that. A mouse chewed the foam. Homeowners insurance paid for it. As you can see from the pictures the top was removed to replace the liner. Is the damage so bad that you cannot seal the foam with waterproof tape or silicon?
  5. At least the 987 is not silver.... I met the new owner of your 986, Dan, at the RMG tech session in Sunnyvale last weekend. Car was on the lift.
  6. This was on Rennteam.
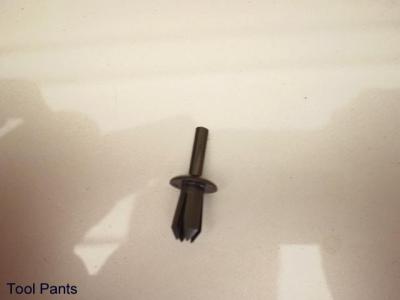
  7. There are 2 plastic "rivets" that have a pin in the middle. This pin expands the the rivet. Hard to see that there is a pin in the middle. You need to push the pin out.
  8. I think these are Cayenne bolts.
  9. That is the usual sympton of a bad switch.
  10. http://forums.rennlist.com/rennforums/show...ad.php?t=313474 Many years ago, one of our local owners came up with a simple timer that replaced your finger holding the switch down. Ed Brakus, which became Sharkworks/Touch Top. The prototype timer was large and tested on my 1997, because Ed had a 2001. The final version of the timer was much smaller. There were/are other products that do the same thing. SmartTop is just one, and relatively new in my 7 plus years of Boxstering. Ed move out of the area long ago. If Sharkworks still exist it is only because Ed came up with another gizmo for another car. If you can keep the price down I think you will find a market.
  11. Henry has 6mm spacers and he drove 10k miles with the standard length wheel bolts. Until I teased him, and then he put in the 50mm GT3 bolts. But, if your wheels fall off, don't come looking for me....
  12. Fix my crappy computer and I'll tell you.
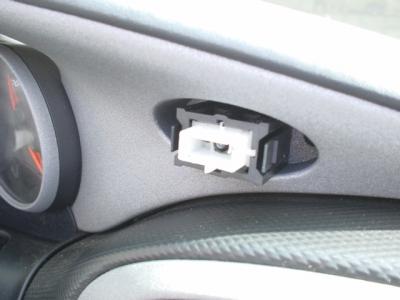
  13. Turn signals do run through the flasher switch. Push the oval button so that the button sticks out, like you do to turn on the flashers. Look at the sides of the button and you will see a slot. Stick a small screwdriver in one of the slots and pry the button off. Behind the button is the switch. There is a tab on each side of the switch. Squeeze the tabs with you finger and thumb and at the same time you pull on the white part of the switch with needle nose pliers. Buy the part as a 996 part. If you buy it as a 986 part you also get the button, so it cost more. If you buy it as a 996 part you get just the switch. Never figured out why Porsche does this.
  14. This is all I could find from the old Danny days.
  15. Cassiebox has covered the subject. I am also looking/bidding on a 6x40 M490 analog amps from a 996 that I see on ebay for rear speakers. So do not bid against me.
  16. I have the first year 986, 1997, and do not use the dip stick. I trust the oil level gauge, just like I trust the fuel level gauge. Like Loren said, the dip stick went away when the 987 came out in 2005.
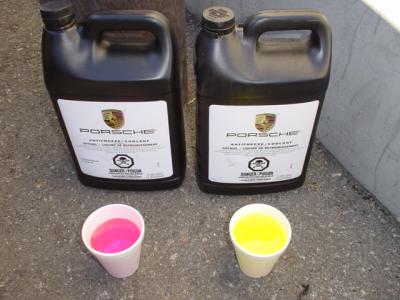
  17. Porsche went pink when the 987 came out. The Cayenne had always been pink. You can mix them.
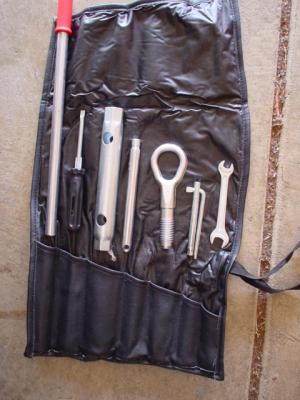
  18. It is the round bar that should be in the tool kit in the picture with a red plastic cap on it to protect the point.
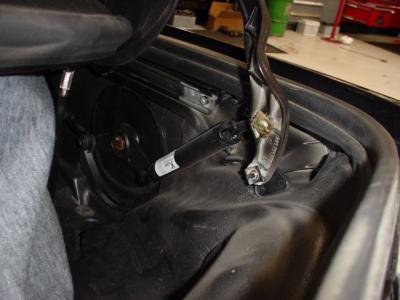
  19. #10 on the diagram is one of the two black metal push/pull rods for the clamshell. They look like a small shock absorber. I doubt if you broke this part. You can see the right side push rod in the picture.
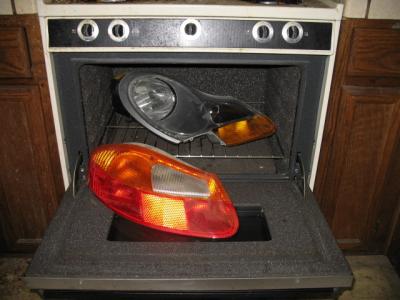
  20. Baked headlight, with a side order of tail light....
  21. Long time, Danny. Come on over some day and we can bake car parts, but it will not fit in my microwave oven. :rolleyes:
  22. You can find the 2003 and 2004 order guides here. http://www.renntech.org/forums/index.php?a...&showcat=13
  23. I have a 1997 with the original clutch and have this noise. It comes from the bell housing when I push on the clutch pedal. I think it is the bearing release lever and the ball pivot point. Years ago I was looking at the 996 TSBs and I remember one on this isse. There are revised parts. I seem to remember a TSB for the 986 but it is one of the missing ones.
  24. One of the local guys, Danny, took the headlights apart a few years ago. He also had burned lenses from high watt bulbs. He put in some type of projector something in the headlight. I did not ask him his method, other than he said he had to crack them open. Someone with a trashed headlight might want to try the heat method and see if it works on a Boxster headlight.
  25. First, I can see no way to remove the lense and reflector throught the back hatch used to replace the bulbs. Way too big. Must be put in before the assembly is put together. Second, I have heard on some cars you can put them in an oven and separate the housing. All I can tell you is that 3 years years ago I took a damaged headlight apart and had to destroy it to do so. There is a rubber seal and it is glued together. When I broke the seal I also broke the plastic. I did not try heat. Brute force was my method. If someone wants to send me their headlights I'll be happy to give it another go....
×
×
  • Create New...

Important Information

We have placed cookies on your device to help make this website better. You can adjust your cookie settings, otherwise we'll assume you're okay to continue.