Jump to content

Welcome to RennTech.org Community, Guest

There are many great features available to you once you register at RennTech.org
You are free to view posts here, but you must log in to reply to existing posts, or to start your own new topic. Like most online communities, there are costs involved to maintain a site like this - so we encourage our members to donate. All donations go to the costs operating and maintaining this site. We prefer that guests take part in our community and we offer a lot in return to those willing to join our corner of the Porsche world. This site is 99 percent member supported (less than 1 percent comes from advertising) - so please consider an annual donation to keep this site running.

Here are some of the features available - once you register at RennTech.org

  • View Classified Ads
  • DIY Tutorials
  • Porsche TSB Listings (limited)
  • VIN Decoder
  • Special Offers
  • OBD II P-Codes
  • Paint Codes
  • Registry
  • Videos System
  • View Reviews
  • and get rid of this welcome message

It takes just a few minutes to register, and it's FREE

Contributing Members also get these additional benefits:
(you become a Contributing Member by donating money to the operation of this site)

  • No ads - advertisements are removed
  • Access the Contributors Only Forum
  • Contributing Members Only Downloads
  • Send attachments with PMs
  • All image/file storage limits are substantially increased for all Contributing Members
  • Option Codes Lookup
  • VIN Option Lookups (limited)

Tool Pants

Moderators
  • Posts

    4,786
  • Joined

  • Last visited

  • Days Won

    6

Everything posted by Tool Pants

  1. It gets even worse. There is also an emergency release cable for the engine lid. See if you can spot it in this picture. You are suppose to get to the front cable by reaching under the plastic fender liner. Problem is, the cable is not always where it is supposed to be. Pull the headlight and you will find a place that you can stick the loop and still reach it from outside the car. Secure the cable in place with a piece of duct tape. You may even find the original pice of duct tape.
  2. What was the code given to you by this company that worked?
  3. When the Cayenne first came out 5 years ago the local dealership had a tech session. As a Boxster owner I did not pay much attention. Don't remember which version it was. But I remember it had 2 batteries, and 1 was under the seat. The second picture I think is the battery where the spare would go.
  4. Becker use to have a message board. http://www.beckerautosound.com/beckerboard/index.php When this tyle of question was asked, retrofit a CDR-23 in anything other than a 2003-2004, the answer was no. The CDR-23 and the MOST thing started in 2003.
  5. On a message board someone said if you pulled the DRL relay that the license plate lights don't work. No clue if this is true.
  6. Old news, but local dealership has one in the showroom. Lots of stickers....
  7. Lloyd in the UK put one in a few months ago. http://www.boxa.net/forum/index.php?showto...mp;#entry335783
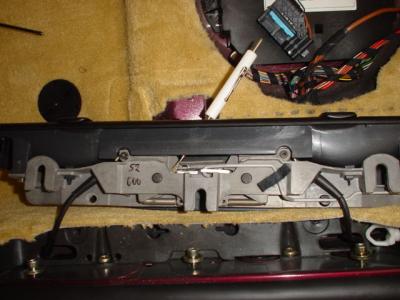
  8. You pull on the rear of the carpeted trim panel. Sometimes the connector is just sitting there. Sometimes you have to fish around for it. Starting in 2003 Porsche put tape on the end of the connector, like you see in the picture.
  9. Unless you have just the right length allen it is hard to get to the allen bolts with the seat in place. Also hard to see them. When we did it the seat was out. I would suggest you unbolt the seat, and perhaps you can move it around without having to remove it from the car. Once the seat is not blocking your view it is easy to loosen the allen bolts. There seems to be a dispute if it is a 4 or 5mm allen. It has been a few years since I did this. I think it was a 5mm.
  10. If it is the Ottles muffler you might ask them if there is an inexpensive way to mount a 2.5 muffler on a 2.7/3.2. I do not know of a way. No one wants to put the stock 2.5 muffler on a 2.7/3.2. What people like to do it put the 3.2 muffler on a 2.5, because the 3.2 muffler has 2 tips. And for that you use the factory adapter for the sport exhaust. Well, some people do use the adapter. Just for fun, here is a picture of a 3.2 muffler that was mounted on a 2.5 by the original owner. The new owner of the 2.5 noticed that the 3.2 muffler was drooping. When the new 2.5 owner removed the 3.2 muffler he found a homemade adapter. Made out of a shower rod and hose clamps....
  11. A 2.5 muffler mounts differently than a 2.7/3.2 muffler.
  12. http://www.renntech.org/forums/index.php?s...646&hl=stop
  13. The difference between 599,999 or 999,999 is if the display is in the miles or kilometers mode. My 999,999 picture is kilometers. Put the key in the ignition. Disconnect the battery negative cable. Turn the key to position 1. Then tun the key to the off position. Then hook up the battery cable. The display should be back to normal. You may have to twist the knob to change between US and metric miles. Give Loren your radio serial number so he can guess the code. All that is left is the air bag light. You had a low voltage problem. That is why the odometer display went funky and the radio lost the code. If I remember correctly there is a low voltage fault code for the air bag control unit. I had that fault when I had battery problems. I cannot remember if that will trigger the air bag warning light. I would just turn the light off with a PST2/PIWIS or Durametric and see if it comes back on.
  14. I need to take some new pictures. In the meantime, I found what I remembered. There is a new insert, part number 9699/2 for the tool, shown as #5. Porsche calls #5 an assembly aid for the PTFE Cayenne style seal.
  15. And if you have a tip then you also have a blue connector. Wish people would not look at the pictures in the link, since they were taken when we did 6 OBC retrofits w/stalk at the same time, and I am in the pictures. Those pictures are 100 years old. Don't do it that way anymore.
  16. In post #1 there is a picture of 9699 that was taken at a 2003 tech session. This is that same 9699 tool taken at a 2005 tech session. I still have in the back of my mind there was a change made to this tool when the Cayenne style seal came out, to accommodate the green plastic installation ring. I remember reading something....
  17. You read the warning. With that said. There are people who only put on the front bumper cover because like you they don't like the wing. There are people who put on aftermarket bumper covers and wings. There are Boxster people who put on the turbo cover, then some with the 996 cover. And so on. None of this is approved by Porsche, and I think these people are still alive. There are people who use tires not approved by Porsche, and oil. And so on. But if you are cruising on the autobahn at 200 mph and flip, you read the warning...
  18. Bet it looks something like this.
  19. The way I remember it with Aerokit II is that the connector for the electrically operated standard moveable spoiler was disconnected while the spoiler was in the down position, so it would no longer operate up and down. You/porsche did not want to have the moveable spoiler come into operation when the fixed wing was also bolted to the trunk lid.
  20. This thread started almost 5 years ago. Guess I will have to update it one of these days with new pictures. The screws are to secure the tool on the end of the crankshaft. The tool does not rotate. From my failing memory I think the tool changed again when the Cayenne type seal came out, the type of seal with the green plastic assembly ring. There are aftermarket versions of this seal tool that I have seen for sale. Can't say anthing about them because I hang around the dealership, and they only use the factory tool.
  21. The second nut is acting as a jam nut. I replaced the hand brake lever on a local car a few years and the jam nut was tight. I assume the console is in place and you are trying to work through the storage box. When I did it the console was out because we were also doing a B&M install. If you give up you might remove the console as you will have a lot more room.
  22. Don't know of a part number for just the crest, as the crest is part of the 3 spoke air bag.
  23. That ebay listing is sort of misleading. The first picture shows a 3 spoke air bag with a recessed crest. What is being sold is a crest that you stick on the 4 spoke air bag to cover the embossed crest. Some of our local owners have bought that type of crest for their 4 spoke.
  24. There is a spec for "intake pipe to cylinder head." If that is it then it is 7.5 foot pounds.
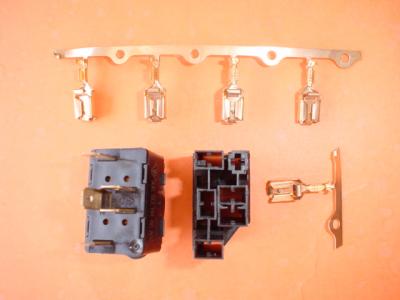
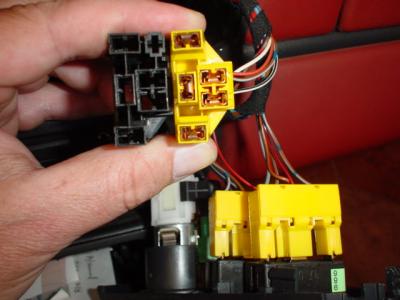
  25. I don't think the wires are long enought to relocate switches that far away, unless you extend the wires. Why do you want to do this? Here is a switch connector. Porsche sells the connectors and pins. I bought the one in the picture as a VW part because it was cheaper. That was a tip I got from Sandy.
×
×
  • Create New...

Important Information

We have placed cookies on your device to help make this website better. You can adjust your cookie settings, otherwise we'll assume you're okay to continue.