Jump to content

Welcome to RennTech.org Community, Guest

There are many great features available to you once you register at RennTech.org
You are free to view posts here, but you must log in to reply to existing posts, or to start your own new topic. Like most online communities, there are costs involved to maintain a site like this - so we encourage our members to donate. All donations go to the costs operating and maintaining this site. We prefer that guests take part in our community and we offer a lot in return to those willing to join our corner of the Porsche world. This site is 99 percent member supported (less than 1 percent comes from advertising) - so please consider an annual donation to keep this site running.

Here are some of the features available - once you register at RennTech.org

  • View Classified Ads
  • DIY Tutorials
  • Porsche TSB Listings (limited)
  • VIN Decoder
  • Special Offers
  • OBD II P-Codes
  • Paint Codes
  • Registry
  • Videos System
  • View Reviews
  • and get rid of this welcome message

It takes just a few minutes to register, and it's FREE

Contributing Members also get these additional benefits:
(you become a Contributing Member by donating money to the operation of this site)

  • No ads - advertisements are removed
  • Access the Contributors Only Forum
  • Contributing Members Only Downloads
  • Send attachments with PMs
  • All image/file storage limits are substantially increased for all Contributing Members
  • Option Codes Lookup
  • VIN Option Lookups (limited)

Tool Pants

Moderators
  • Posts

    4,786
  • Joined

  • Last visited

  • Days Won

    6

Everything posted by Tool Pants

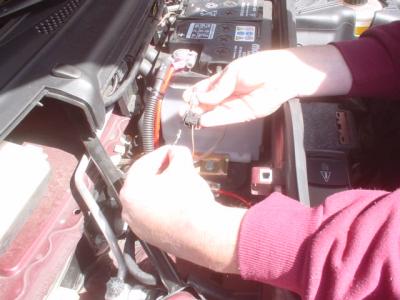
  1. That is the one. http://www.renntech.org/forums/index.php?showtopic=3389 And here it is in action. Removing the pin from the black 21 pin connector and the pin for the 2 pin heated washer connector, during Henry's litronic install. Again, you first must unlock the connector before you can use the tool to remove the pin. You unlock the 21 pin connector from the back, and I think the 2 pin connector from the side. AMP/Tyco calls it a secondary lock. Only after the connector has been separated and unlocked can you use the tool to push the pins out.
  2. The run time on the DVD is 42 minutes. We show the 3 different methods to combine 2 wires together. Actually, my own method on the DVD is the 4th. I remove the pins because I have the pin removal tool then solder the new wire to the existing pin already crimped onto the wire - so the 2 female pins in the retrofit kit are not used. No method is better than the other so as long as you make a good electrical contact that will last. Depending on the year you will be working with a 21 pin black connector on the passenger side behind the carpet, or a 21 pin white connector next to brake booster. When you separate the connector you will see the male and female pins. You add the wire from the control unit to the female side of the connector, of either the black or white connector. The other wire from the control unit you will be adding to an existing wire is the connector for the passenger side heated windshield washers, again on the female side. This connector has not changed over the years. Both connectors, 21 pin and washer, must be unlocked before your can remove the pins if you choose that method.
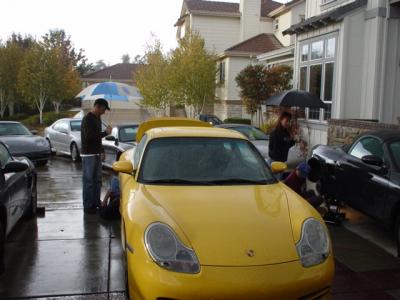
  3. At Henry's house. http://vssi-eda.com/hverheyen/box_pics/clu...address_dtl.jpg Sart at 10:00 am, for 3 hours. No messy projects, like oil changes. Henry has an empty 3 car garage so this is rain or shine. Not like a little bit of rain has stopped us in the past.
  4. I do this at the same time we do a brake bleed. I use the Motive. After I have bled the left rear brake caliper I release the pressure from the Motive. First, remove the rubber cap for the clutch bleed nipple. I then crack open the clutch bleed nipple from behind and from the drivers side where the exhaust is. I use a deep socket on a 1/4" drive ratchet to crack open the bleed nipple. From my memory it is 11 mm but some cars car 9 mm. You can also use a normal box end 11 or 9 mm wrench if you have a very small one, as it is hard to swing the wrench due to the confined area. That is why I like to use a ratchet wrench. I then remove the 1/4" drive ratchet and leave the socket on the nipple. Close the nipple with your fingers on the socket and put the drain tube on the nipple while you are under there. The nipple should be just finger tight. Pump up the Motive and then open the nipple with your fingers. When enough fluid has come out of the tube close the nipple with your fingers and disconnect the Motive. Tighten the bleed nipple with whatever tool you are using and put the rubber cap on while you are under there. If you are doing the brakes at the same time then you pump up the Motive and do the front calipers.
  5. The only trim piece Porsche has for the a/c display just above the batwing, like in the picture, is what I gave you. Porsche does not sell a trim piece for where the cd holder is in the picture. You can do the retrofit now while you are waiting for the trim piece. You will be running the a/c display wiring harness down to the batwing. It is very long so there is no problem with it reaching. I suggest you remove the radio or at least pull it out a bit first, as the connectors for the harness are large and it is hard to get them past the back of the radio head.
  6. 1. It has been so long since I used it I do not remember. Check the owners manual if you have one, or check this board as there is one here. 2. No clue. 3. Porsche has never made a hp increase for the sport exhaust, and after over 5 years of Boxstering I have never seen anything that proves it does anything except make more noise.
  7. The PST2 does not work with the new 997/987. The PIWIS works with the older 996/986. I tried to buy a used PST2 from the shop when the mechanics got the new tester, but that is when one of the mechanics I know said they were keeping them. If Porsche does with the PST2 what they did with the Bosch hammer, then sooner or later they will stop having updated software and become obsolete. Maybe then I could buy one for a decent price.
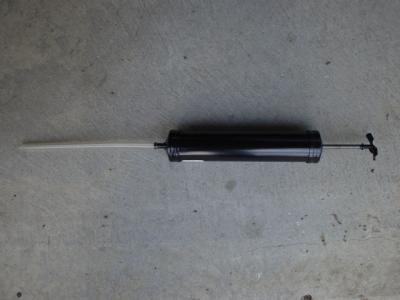
  8. At a tech session we had a few years ago the mechanic added a bit of fluid. I do not have a picture of how he injected the fluid into the transmission fill plug (which looks like a drain plug) but it was just like this. You pull on the end of the rod to suck the fluid into the tool. Then stick the plastic tube into the fill plug and 'inject' it into the transmission. Looks like the official tool is gravity fed.
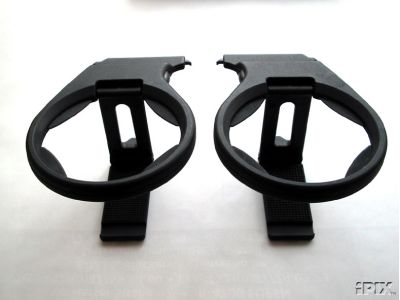
  9. On 1997-2000 there were holes in the side vents to mount this style cupholder. Porsche pulled this style cupholder from the cars in 1997, so we had to buy them from Germany. You can now buy them in the US. Porsche eliminated the holes in 2001 when the in-dash style came out, which was interesting because if you had PCM or DSP you could not have the in-dash cupholders as there was no room for them. And you could not have the vent style because there were no holes. The a/c trim piece for black plastic is 996 552 339 00 01C
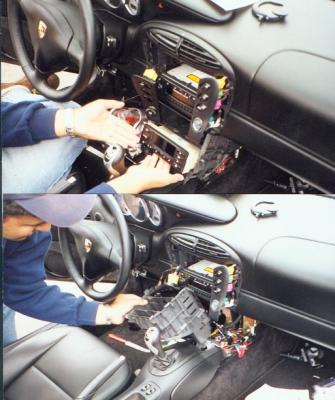
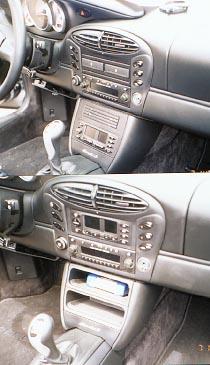
  10. I came up with the word cupholderectomy almost 4 years ago when we removed the in-dash ones from a 2001. Now you want to put them in. :P There is a 4 page instruction sheet from Porsche on how to do the retrofit. The retrofit kit has all the parts except for the a/c display trim piece for it's new location just above the shift. You need to buy it. It is not included in the kit because the trim you need could be in leather, wood, etc. This is a before and after shot.
  11. My dealer has a few. They kept the older PST2. So now 6 of the 8 mechanics have a tester.
  12. Look at the 996 TSBs. There is one for the wrong time displayed. August 14th. With a retrofit PCM2 the unit may not be coded properly.
  13. There is no cable. It is done electronically. I have asked Peter this and he did not know off the top of his head. One of these days I will see if I can figure it out from the wiring diagrams. Each wheel hub has an electronic speed sensor for the ABS. I thought perhaps the readings from all 4 were used for and average speed measurement. Peter thought it was the right front. This is all a guess until someone traces the wiring. But you may be on to somethig as to the cause of your warning lights since both need a speed signal.
  14. I'll take a guess. Bank 2 is cylinders 1-3 which on the drivers side on a Boxster. Sensor 1 is the one before the cat. Maybe Loren can confirm.
  15. PNA 500 986 03 is listed as Boxster wheel paint for about $39. I asked a part guy about it once but he did not know what is was. I can only assume it is a can of paint. The strange thing is PNA 500 986 03 S is listed as Boxster S wheel paint for the same price. PNA means it is sourced locally, like car covers and bras.
  16. The first number is the 2003 Bose amp. The part number now ends in 05. I think that was the MOST amp that had problems. Don't see how you can use it on a 1999 since it is a fiber optic amp. Second is the 2002 Bose additional amp. I think that is the small amp that mounted to the standard amp.
  17. You have to give it some time to drop. If it happens again take it in. The common causes per Manny at my local dealer is a bad window regulator or micro switch on the door handle. To find the cause the mechanic removes the door panel to see what is going on when the handle is operated.
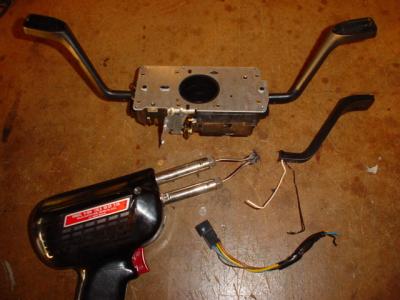
  18. I have never done it. My 1997 has cruise control. Instructions for an e-gas car are here on this board, and at least 2 e-gas owners have done the cruise control retrofit. This pic is for Alee. Cover is off.
  19. I have the same thing from Crutchfield. They give it to you for 'free' when you buy a Traffic Pro, but it is not needed for a Boxster. This aftermarket adapter is something that Crutchfield throw in the shipping box because they do not know what car the unit will go in. The Becker/Traffic Pro also comes with an adapter. We do not use that one either.
  20. http://www.renntech.org/forums/index.php?s...&st=0entry534
  21. Say the name of the coolant again. http://forums.pelicanparts.com/showthread....threadid=170704
  22. Oh, that special tool. :D
  23. We put one in in Henry's 2000 Boxster. Porsche's instructions are not very good. Plus there are Boxster and 996 instructions for the same mirror, but the Boxster instructions fail to note that there was a bridge plug wiring change depending on the year. This is noted in the 996 instructions. We followed the 996 instructions when working on Henry's Boxster.
  24. Curisoity killed the cat. The wires are in the correct slots. Slot #6 is not used. I assume you do not have cruise control. If you are smart enough to figure out how to remove the connector cover and the pins, then you might want to try to retrofit the cruise control. Otherwise, just cut off the stalk.
  25. Us DIYers use the Motive. So does my dealer.
×
×
  • Create New...

Important Information

We have placed cookies on your device to help make this website better. You can adjust your cookie settings, otherwise we'll assume you're okay to continue.