Jump to content

Welcome to RennTech.org Community, Guest

There are many great features available to you once you register at RennTech.org
You are free to view posts here, but you must log in to reply to existing posts, or to start your own new topic. Like most online communities, there are costs involved to maintain a site like this - so we encourage our members to donate. All donations go to the costs operating and maintaining this site. We prefer that guests take part in our community and we offer a lot in return to those willing to join our corner of the Porsche world. This site is 99 percent member supported (less than 1 percent comes from advertising) - so please consider an annual donation to keep this site running.

Here are some of the features available - once you register at RennTech.org

  • View Classified Ads
  • DIY Tutorials
  • Porsche TSB Listings (limited)
  • VIN Decoder
  • Special Offers
  • OBD II P-Codes
  • Paint Codes
  • Registry
  • Videos System
  • View Reviews
  • and get rid of this welcome message

It takes just a few minutes to register, and it's FREE

Contributing Members also get these additional benefits:
(you become a Contributing Member by donating money to the operation of this site)

  • No ads - advertisements are removed
  • Access the Contributors Only Forum
  • Contributing Members Only Downloads
  • Send attachments with PMs
  • All image/file storage limits are substantially increased for all Contributing Members
  • Option Codes Lookup
  • VIN Option Lookups (limited)

pmpjuil

Members
  • Posts

    22
  • Joined

  • Last visited

About pmpjuil

  • Birthday 09/12/1984

Contact Methods

  • Website URL
    http://
  • ICQ
    0

Profile Information

  • Gender
    Male

Profile Fields

  • From
    Vancouver
  • Porsche Club
    PCA (Porsche Club of America)
  • Present cars
    2000 Boxster
  • Future cars
    2003 Boxster S

pmpjuil's Achievements

Member

Member (1/1)

0

Reputation

  1. Hi Derek, I did hook up the rear defroster as well. They work very good. Wiring harness came with the car. Installation for it is very very simple. Just plug them in and you are good to go. Sean.
  2. I just finished installing Maxspeed exhaust and oh boy what a sound. I feel a bit of vibration inside when I step on it and cabin noise increased noticeably but very charming. Installation was very easy. I would definitely recommend this exhaust if anybody is looking for an aftermarket exhaust.
  3. Dear Maurice, finally the installation is done. Iam so exhausted but the top looks unbelievable! I found a bit easier way for me to work by removing the rear frame and started to work from the back towards front. No wrinkles whatsoever and the top was just tight enough for me to pull down little bit and close. I will take some pictures after I get a bit of drink. I really appreciate all your help and give me your address so I can send you a bottle of homemade wine or something haha. Thanks! Sean.
  4. Dear Maurice, I have decided to finish the installation tomorrow because I am a bit confused on installing the backside. Could you correct me if this process is correct for rear? 1. Insert thin-cloth- into the top slot (out of 3 slots) 2. Insert plastic strip into the same slot. 3. Inset a strip with flat surfice (which previously had double sided tape on) 4. Put the rear end of top over these two strips. 5. After lining up the seams, roll or fold the bottom part of the top and put the Fat strip over it. Also, I'm having a problem with making both left and right side's seam to line up. Top is so tight that if I pull one side (driver side curve), the other side (passenger side curve) goes out of the line. Because of this, I do not know how I'm going to put double sided tape between this tight fit between the flat surface strip and the canvas. Thanks Maurice.
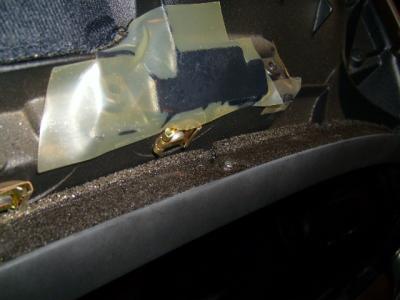
  5. Finally my Clamping rails and sliders have been arrived. So I decided to take the old top down today. Following Mr. Mike Focke's DIY, taking it off was a breeze. I still need to make my foam seal and buy 3M automotive tape so Installation of new top is going to be tomorrow. I took some pictures of my old Foam seal, Old top vs Robbins glass top. Old Top New Robbins Glass top where the U-shape frame is. Bottom (Old Top) and Top (Robbins Glass top) Robbins top does not have 4 holes for Phillips screws. Would I have problem with installing without these holes? Old Foam Seal. No volume to the foal at all.
  6. Thanks for the reply. I have ordered 2 Sliders and 2 Clamping Rails from the dealership and they will be arriving sometime next week. I was going to purchase the Convertible Kit which was about CAD $90.00 (for foam seals) but the dealer didn't seem to know what is included in the kit. I explained to them what it is according to your post (for flapping noise) and they didn't seem to agree with that. They said the kit could be for rips and tears on the canvas. I have about a weak to make my own foam seals using Jimboyle's thread so I will keep you posted. Thank you for everything again Maurice. Sean
  7. Hey Maurice, the top has finally arrived and it looks very good. The Canvas feels exactly same as the one on my car and glass window looks amazing. Bytheway, the installation paper which came with the top says that, I need to get Plastic Rivet (P/N: 986.561.597.00) is this necessary?
  8. Thank you so much Maurice. I feel more motivation, because of especially the last sentence. I've been reading Mr. Mike Focke's DIY article couple of times and I can't wait to try this DIY. Only thing I am worrying about is the long-term glass separation due to glue failure. What is your opinion on that issue Maurice?
  9. My yellowish Green rear plastic window finally cracked! and decided to order Robbins Glass top from ebay. I haven't received the top yet but I'm in the middle of preparing myself for long DIY. I just have few questions before the DIY. 1. Is there any old parts I should replace with new one? 2. Any members here have Robbins Glass top and have advice for me? 3. I'm worried about possible wrinkes and which area is mostly like to give me hard times with getting rid of wrinkles? Thanks in Advance and I will keep you guys posted. Sean.
  10. Just to give updates, both of my CEL codes have been disappeared. I did two things that may or may not be relevant to the codes I have but here they are 1. I cleaned my Throttle Body 2. Bought new Gas cap (My old O-Ring had multiple cracks and it was basically flattened) I cleared both of codes and have been driving for about a week now and no CEL! Ever since I got my boxster, I have had CEL light on and it feels so good to not have them.
  11. Since I love to work on my car, I thought it would be good for me to get OBDII scanner. It is a Multi Protocol Scantool Unit with USB connector. The seller also gave me few softwares to work with and I'm using Digimoto 4.03. Problem is that there are so many numbers and things which I'm not familiar with. Here is a screenshot of the program that I am using. (I think I took this screenshot while idling.) Things that I would like to know are Calculated Load Value Short/Long Term Fuel % Ignition Timing Advance Absolute Throttle Position O2 Voltage Bank One/Two Sensors I have 1 CEL code left which is P0447 (Evaporative Emission Control System vent control circuit open) I couldn't find any leak from the Canister (Inside the right front wheel wall?) Should I look for specific numbers or sensors in the screenshot? Thanks so much for all your help. Sean.
  12. Thanks for the detailed reply kbrandsma. I should take a closer look at other pipes near there for cracks. But my oil level gauge is always full so if there is a crack, I'm hoping that it is very small. Quick question about the oil fill cap checking method though. Check while car is idling right?
  13. The mesh sock is normally located between the accordian elbow and the spring clip on the middle oil fill tub. It is usually about 8-12 inches long. I can't tell if it is missing on your first picture or more than likely it is just completely saturated with oil+dirt. If I want to correct this problem since it does not sound normal, I should change my AOS, middle oil fill tube, and mesh sock? Thanks for all the replies.
  14. I found a very little amount of oil like couple of drops in TB while I was cleaning. Btw, where is the mesh sock located?
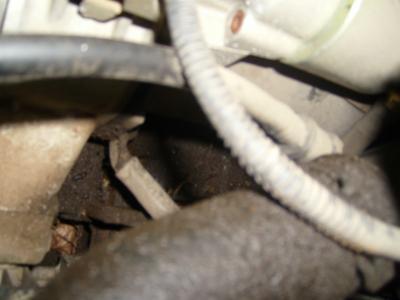
  15. While I was cleaning the engine bay and Throttle body, I noticed one pipe that was covered in what it look to be oil+dirt. When I looked under the pipe, I could see a small puddle of oil. I do get smoke when I start the car but I don't believe they are blue. Right now I have 2 CEL codes (P0430: Catalyst Efficiency Below, P0447: Evaporative Emission Control). Is this oil/white smoke problem related to my CELs? or do I have a two different problem? (One for AOS and One for CELs) Here are some pictures of the pipe. Pipe is located at the passenger side. The Pipe in the middle of this image with a rubbed mark is actually covered in dirt+oil. Under the pipe there's more oil+dirt. And it didn't show up on this picture but where there is a leaf.. there is also a small puddle of engine oil.
×
×
  • Create New...

Important Information

We have placed cookies on your device to help make this website better. You can adjust your cookie settings, otherwise we'll assume you're okay to continue.