Jump to content

Welcome to RennTech.org Community, Guest

There are many great features available to you once you register at RennTech.org
You are free to view posts here, but you must log in to reply to existing posts, or to start your own new topic. Like most online communities, there are costs involved to maintain a site like this - so we encourage our members to donate. All donations go to the costs operating and maintaining this site. We prefer that guests take part in our community and we offer a lot in return to those willing to join our corner of the Porsche world. This site is 99 percent member supported (less than 1 percent comes from advertising) - so please consider an annual donation to keep this site running.

Here are some of the features available - once you register at RennTech.org

  • View Classified Ads
  • DIY Tutorials
  • Porsche TSB Listings (limited)
  • VIN Decoder
  • Special Offers
  • OBD II P-Codes
  • Paint Codes
  • Registry
  • Videos System
  • View Reviews
  • and get rid of this welcome message

It takes just a few minutes to register, and it's FREE

Contributing Members also get these additional benefits:
(you become a Contributing Member by donating money to the operation of this site)

  • No ads - advertisements are removed
  • Access the Contributors Only Forum
  • Contributing Members Only Downloads
  • Send attachments with PMs
  • All image/file storage limits are substantially increased for all Contributing Members
  • Option Codes Lookup
  • VIN Option Lookups (limited)

Loren

Admin
  • Posts

    37,533
  • Joined

  • Days Won

    573

Everything posted by Loren

  1. Correct end guards for seat rails.
  2. It os actually John (not Jeff).
  3. Check the pulleys if they wobble they should be replaced.
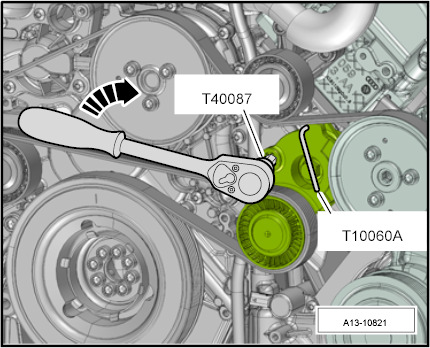
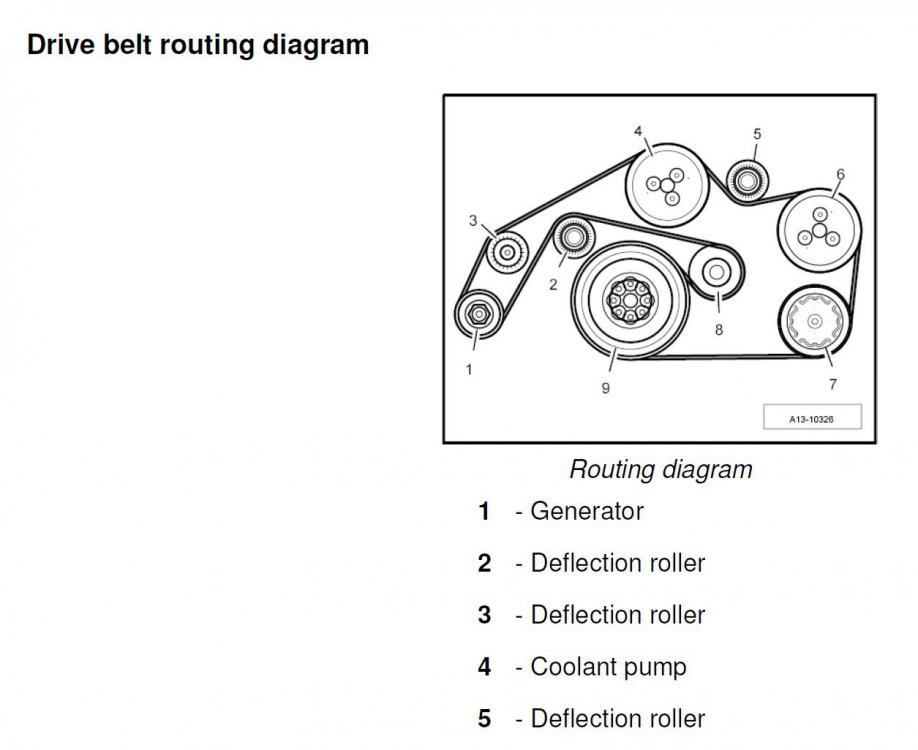
  4. Removing and Installing the drive belt 1. Remove engine cover. 2. Remove front air guide hose. Note: Only remove the drive belt when it is cold. 1. Mark the running direction -arrow- of the drive belt with chalk. 2. Relieve the tension on the drive belt by loosening the tensioner using a suitable tool. To relieve tension on the drive belt, turn the tensioner clockwise. 3. Remove the drive belt and lock the tensioner using locking pin T10060 A. Install in reverse order.
  5. Clear the codes take the car for a short drive (at least 10 minutes) - then recheck the fault codes.
  6. Two beeps mean that there is more than one zone open or that the controller has failed. I would go after the door lock first. BTW... the immobilizer/alarm box did not get wet through plugged top drains or other? If it did get wet then you will need a new or rebuilt one as water damage will lead to future failures as thing corrode.
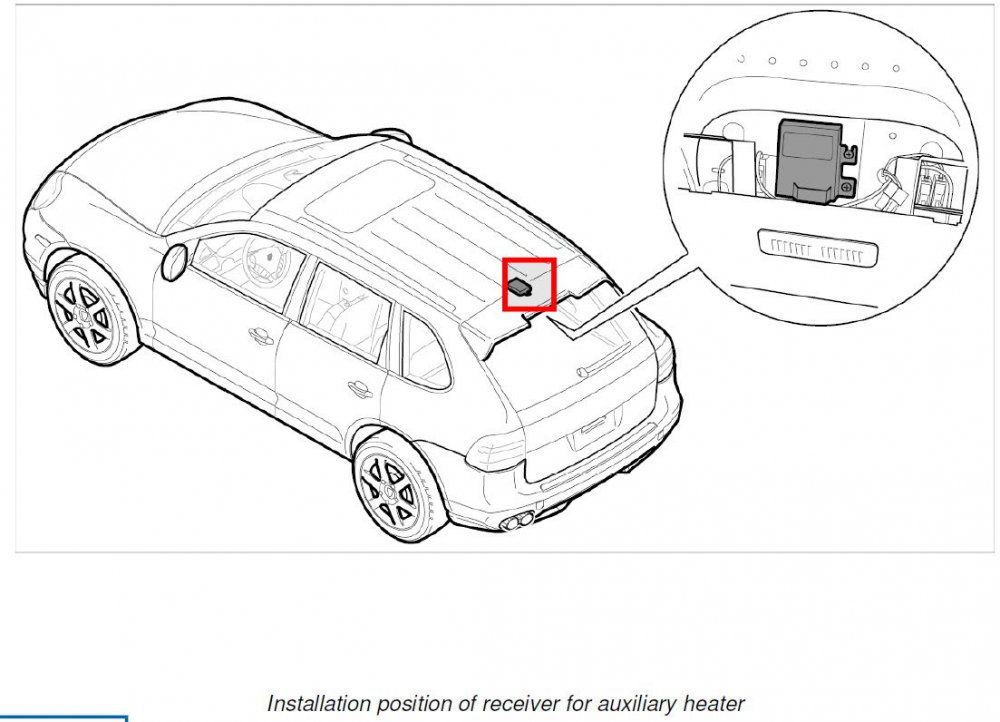
  7. Yes on central locking switch. But historically these are usually mechanical failures in the door lock. If the gas lock in is intact is the receiver in the gas lid there?
  8. Check to see if the lock pin is broken off. If so, I did a DIY on how to replace that here:
  9. Possible cause of fault • Central locking switch faulty • Short circuit to ground/open circuit in wiring between the alarm system control module, central locking switch or door locks • Driver's/passenger's door lock faulty • Control module faulty
  10. Fault 60 - Central locking limit position - Locked not reached Most likely a mechanical failure in the door locking mechanism (in the door that does not lock). You can also listen for audible click when you lock the door - try using the key to lock. Do a search here for door lock repairs.
  11. I suggest you clear the codes - operate the doors and locks again - and see what codes you get then.
  12. You are correct - it changed in 2009 and I missed it.
  13. Tinted or untinted? Many US/Canada cars had slightly tinted side windows.
  14. PM me your VIN and I will look it up.
×
×
  • Create New...

Important Information

We have placed cookies on your device to help make this website better. You can adjust your cookie settings, otherwise we'll assume you're okay to continue.