Jump to content

Welcome to RennTech.org Community, Guest

There are many great features available to you once you register at RennTech.org
You are free to view posts here, but you must log in to reply to existing posts, or to start your own new topic. Like most online communities, there are costs involved to maintain a site like this - so we encourage our members to donate. All donations go to the costs operating and maintaining this site. We prefer that guests take part in our community and we offer a lot in return to those willing to join our corner of the Porsche world. This site is 99 percent member supported (less than 1 percent comes from advertising) - so please consider an annual donation to keep this site running.

Here are some of the features available - once you register at RennTech.org

  • View Classified Ads
  • DIY Tutorials
  • Porsche TSB Listings (limited)
  • VIN Decoder
  • Special Offers
  • OBD II P-Codes
  • Paint Codes
  • Registry
  • Videos System
  • View Reviews
  • and get rid of this welcome message

It takes just a few minutes to register, and it's FREE

Contributing Members also get these additional benefits:
(you become a Contributing Member by donating money to the operation of this site)

  • No ads - advertisements are removed
  • Access the Contributors Only Forum
  • Contributing Members Only Downloads
  • Send attachments with PMs
  • All image/file storage limits are substantially increased for all Contributing Members
  • Option Codes Lookup
  • VIN Option Lookups (limited)

Loren

Admin
  • Posts

    37,560
  • Joined

  • Days Won

    581

Everything posted by Loren

  1. I would certainly make sure it is not the hose/clamp before replacing the water pump.
  2. Check for a corroded fuse connection or bad headlight switch.
  3. The only retrofit kit that I know of is for the Cayenne. I do not know if you can put that (or a 997/987) version in a 996. It is a custom unit for Porsche and may require MOST (I can't check my schematics right now as I am traveling). Other options are the aftermarket Homelink system or the garage door opener hack in the DIY section.
  4. Try our Porsche Technical Glossary (on the Quick Menu) :) "Digital Motor Electronics - Porsche's engine management system, the Bosch "Motronic" system, that controls both fuel injection and ignition functions."
  5. Is the purge fan running or not? If not then check the fuse if so you likely have a bad sensor in the tank or a bad temp sensor.
  6. Please try using our Search feature next time... http://www.renntech.org/forums/index.php?showtopic=5
  7. Yes, you can get them almost anywhere. Just make sure they are stainless steel.
  8. Try the process here. If this does not work you likely need a new key/programming.
  9. If it is a factory kit - then it should have been included. Perhaps the paint shop that painted your kit forgot to put it back in? I am traveling and won't have access to my parts lists until late next week...
  10. Here is the procedure for a 996... Removal 1. Unscrew the front rear-axle cross member (two MI0 screws) to facilitate subsequent assembly work. 2. Detach line No.1 on the clutch slave cylinder and remove line from holder No.2. Cover or close line No.1 and the connection bore in the clutch slave cylinder. 3. Remove holder with clip No.2 (to facilitate assembly). To do this, undo the 2 screws on the transmission side cover. 4. Undo fastening screws No.3 and remove the clutch slave cylinder from the transmission housing. Note - The following tools can be used to undo and tighten screws No.3: Lower screw: 3/8 inch changeover ratchet in combination with a short extension (approx. 100 mm long) and 13 mm socket wrench insert. Upper screw: 3/8 inch changeover ratchet in combination with an extension (approx. 250 mm long), universal joint and 13 mm socket wrench insert. Installation 1. Grease end of the push rod of the clutch slave cylinder- in the area located in the ball socket of the release lever when installed - with a thin coat of Olista longtime 3 EP (available as a spare part). 2. Fit the clutch slave cylinder and tighten the fastening screws (23 Nm (17 ftlb.)). Note - When inserting clutch slave cylinder, it is necessary to overcome the spring force acting on the push rod whilst fitting a fastening screw. Refer to the assembly instructions in the following text. Assembly instructions for inserting the clutch slave cylinder Move clutch slave cylinder to installation position and then fix/centre it at the lower fastening point using a drift punch (A) measuring 5 x 120 x 10 mm. Align clutch slave cylinder - with the drift punch (A) in place - so that the upper fastening screw No.3 can be fitted. After fitting the upper fastening screw No.3, remove the drift punch (A) and screw in the lower fastening screw. Tighten upper and lower fastening screws (23 Nm (17 ftlb.)). 3. Fit clutch line on clutch slave cylinder (do not tighten it yet). Fit holder with clip on the transmission side cover (tightening torque of the two screws: 25 Nm (19 ftlb.)). Clip clutch line into the holder and tighten the line. 4. Bleed hydraulic system of the clutch. Important notes: The clutch hydraulics must always be filled or bled using a pressure filling and bleeding device. Furthermore, the bleeder valve must be opened sufficiently and the gauge pressure must be approx. 1. 5 bar. Before the system is filled or bled, the clutch pedal must be in the "Pedal fully depressed" position. Important: As there is no system pressure, servo kinematic effects will cause the clutch pedal to move forward abruptly. In order to avoid damage, the pedal must be guided manually. Bleed the system until no more bubbles appear at the bleeder valve (use a collecting bottle with transparent hose). If the system was open previously, the minimum filling or bleeding time must be 30 seconds. 5. Check operation of the clutch. Repeat the bleeding process if the clutch does not operate (disengage) correctly. 6. Install rear axle cross member. Tightening torque of the two screws 65 Nm (48 ftlb.).
  11. Unless you break something else - all you should need is the proper tank for your model year AND model type (i.e. C2, C4, C4S, etc.). I like to replace old spring type clamps with the screw type but that it is up to you.
  12. Yes there should be a divider piece in the opening. Here is a pic of my factory aerokit rear spoiler. I have not found a part number -- yet...
  13. MY02 is kind of unique as it is the last year of the non-MOST systems. You can install a factory PCM 2 but not PCM 2.1 (or newer) Nav system.
  14. Probably, but the price list says to use 997.571.219.00 instead.
  15. 997.571.219.00
  16. Yes, but use Kirby's instructions as the late model cars use different color (trigger) wires.
  17. Not really - if you buy a used cluster and OBC is on then it is already done. If the used cluster has OBC off then it will have to be turned on.
  18. When Porsche went to the newer (dot matrix) cluster you now have to turn OBC on in BOTH the cluster and DME. On older cars it is just in the cluster.
  19. Outside temperature sensor.
  20. Please do not double post.
  21. As I recall you unscrew the locking button then it just pulls off (hard). When you install press on in the correct position until properly in contact. The twisting lock must engage with lock on shift lever.
  22. It is easy to do with a PST2 or a PIWIS tester - this has been covered here many times (with pictures).
  23. Porsche Parts at Dealer Cost
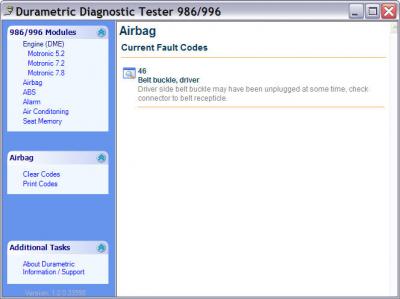
  24. With a diagnostic tool like the Durametric Software or a PST2 or a PIWIS tester. These tools can read actual values of the MAF air flow as well as fuel trims.
×
×
  • Create New...

Important Information

We have placed cookies on your device to help make this website better. You can adjust your cookie settings, otherwise we'll assume you're okay to continue.