Welcome to RennTech.org Community, Guest
There are many great features available to you once you register at RennTech.org
You are free to view posts here, but you must log in to reply to existing posts, or to start your own new topic. Like most online communities, there are costs involved to maintain a site like this - so we encourage our members to subscribe or donate. All subscriptions and donations go to the costs operating and maintaining this site. We prefer that guests take part in our community and we offer a lot in return to those willing to join our corner of the Porsche world. This site is 99 percent member supported (less than 1 percent comes from advertising) - so please consider an annual subscription or donation to keep this site running.
Here are some of the features available - once you subscribe RennTech.org
- View Classified Ads
- DIY Tutorials
- Porsche TSB Listings (limited)
- VIN Decoder
- Special Offers
- Paint Codes
- Registry
- Videos System
- View Reviews
- and get rid of this welcome message
It takes just a few minutes to register, and it's quality Porsche information at a low cost.
Contributing Members also get these additional benefits:
(you become a Contributing Member by subscribing or donating money to the operation of this site)
- No ads - advertisements are removed
- Access the Contributors Only Forum
- Contributing Members Only Downloads
- Send attachments with PMs
- All image/file storage limits are substantially increased for all Contributing Members
- Option Codes Lookup
- VIN Option Lookups (limited)

-0001-0001.png.112c13ee97acfad0cb1e70d195cc9a0e.png)
Loren
-
Posts
37,902 -
Joined
-
Days Won
650
Content Type
Profiles
Events
Forums
Exterior Paint Colors
Downloads
Tutorials
Links Directory
Collections
Classifieds
Store
Everything posted by Loren
-
If it does not shut well it is likely that your hinge is broken or bent. In that case you will need to have the hinge TSB performed. The TSB replaces the original plastic hinge with the current metal one. Some dealers will do the TSB for free and some will want to charge for it. You can check the microswitch when the hinge is replaced. If you want to do it yourself send me a PM and I'll send you the TSB. Tools you will need are a Torx drivers, a drill, and pop-rivet gun.
-
-0001-0001.thumb.png.17f5bb25bf8ec261a17c21e6321c8492.png) Try our neat search function... That is discussed here and here and likely several other places too. :D
Try our neat search function... That is discussed here and here and likely several other places too. :D -
Rattles in plastic parts
Loren replied to danjen's topic in 996 Series (Carrera, Carrera 4, Carrera 4S, Targa)
There is a 9 page TSB (1/00 7018 Noises in the Dashboard) dealing with quieting dash rattles (it is available here to contributing members here). Send me a PM with your email address if you want it. -
I would buy the whole piece that includes the connector. Have the dealer check as I think sometimes they sell this as all one part (under the first number). Then all you do is unplug the old one and plug the new one in. Or you may need to buy both and have all new parts. 996 602 101 01 Ignition Coil ($36.73 as of Nov 2003) 996 602 103 01 Socket Extension ($11.11 as of Nov 2003)
-
Yes, it is the same.
-
Should fit fine.
-
Fit TT wheels on 99 C2
Loren replied to jubalchill's topic in 996 Series (Carrera, Carrera 4, Carrera 4S, Targa)
TT wheels will not fit a narrow body car because of the offset. Late model GT3 wheels (same width) will fit a narrow body car (brcause they have the correct offset). Now with that said - putting wider wheels on the car without changing the front wheel width also will give you quite a bit more understeer - in a car that already has quite a bit. If you are considering 11' rear wheels then consider at least an 8" front and better yet an 8.5" wheel with a 235 or 245 width tire (the 245s may rub a little in tight turns). The car will handle much more predictably (IMHO). -
I suggest that you solve one problem at a time. The horn beep when you lock your car means that you have an alarm zone open. Most common causes for this are a bad or broken microswitch in the front trunk or a bad or misaligned microswitch in the center console.
-
Yes and Yes. It may not miss now but when it gets wet it likely will.
-
996 505 553 04 01C is for manual transmission cars and does not have the opening for the 3rd radiator. 996 505 553 05 01C is Tiptronic cars OR cars with a 3rd radiator. (parts numbers are for MY98-MY01 996 - as the bumper changed in MY02)
-
Plastic piece on hood latch
Loren replied to steve_wilwerding's topic in 986 Series Part Number Requests
Can you tell us which part? -
Have a look at the Brey-Krause site. They have instructions and all the mounting kits.
-
reverse lights stopped working
Loren replied to Paul Strong's topic in 996 Series (Carrera, Carrera 4, Carrera 4S, Targa)
Have you had your transmission out lately? Like for an RMS replacement? In at least a couple of cases dealers have forgotten to reconnect the reverse switch wires after an RMS replacement. If not, check the fuses (B5) and the wires (loose or disconnected). -
This is the first request. If there is interest I will be happy to create one for 356 (or 914, 924/944, 928, etc., etc.).
-
boxster bearing
Loren replied to mrslva's topic in 996 Series (Carrera, Carrera 4, Carrera 4S, Targa)
Here is what the service manual shows for tools: Their method requires removing the wheel hub to press out the bearing - so, their method would require removing the lower strut mounting. -
Can I adjust clutch cable by myself?
Loren replied to boxer6's topic in 996 Series (Carrera, Carrera 4, Carrera 4S, Targa)
The clutch on the 996 is hydraulic which means it operates just like the brakes on fluid displacement. So, the first thing I would suggest is having the clutch bled. If that does not fix it then there is a small amount of adjustment in the clutch push rod but I don't think as much as you describe. Also, there were some TSBs for some of the early cars (MY99-01) for pedal modification and new clutch springs so that could be part of it also. Have a dealer check your cars service history and see if any of the clutch TSBs have been performed. -
Fueling problems
Loren replied to MikeA's topic in 996 Series (Carrera, Carrera 4, Carrera 4S, Targa)
There was a problem on earlier cars that might be occurring again. Difficulty filling the fuel tank can occur if the flexible fuel hoses in the fuel tank obstruct the inner flap of the fuel filler neck. On earlier cars this was caused by hoses that were not tie-wrapped down and they would work their way up and cause the pressure problem. Since your car is a 2004 your dealer should be able to inspect for this and correct it. -
Interior trim parts
Loren replied to Barrett's topic in 996 Series (Carrera, Carrera 4, Carrera 4S, Targa)
(1) The B&M Short Shifter install instructions cover removal and re-installing pretty well. You can download a PDF here. The trim wings just snap off and you will need to transfer the metal clips from the old console to the new one. The lock, microswitch and console lid (with hinge) will also need to be transferred to the new console. The lock and switch are obvious, the lid will need to have the hinge pin pushed out and then the hinge and pin will have to be moved to the new console and installed pre-loaded (so the spring action works). Take a pic or study the old one before you transfer the hinge as some folks get confused. You will also need to unscrew the console tail piece and transfer it to your new console. (2) The switches have tabs that you push to release. I suggest disconnecting the battery for that. The lighter is a little tougher (and tricky) and it covered in this thread. (3) I think that they recommend disconnecting the battery because you have to remove the emergecy light switch (which always has power). -
Need reverse lookup, part# 996.573.045.01
Loren replied to jonathan's topic in 996 Series Part Number Requests
Because the fuel was heated at the engine (but not used). It is then cooled on the way back to the tank. -
I am running 18" wheels and the pressure for them is different. The factory recommends 36 front and 36 rear for 17" wheels. I've found that different tires and driver "style" preferences make it very hard to post the best tire pressures. My advice is to try some small adjustments and see which suits your driving style and tires. I would not go below 32 PSI or above 40 PSI on 17" wheels. 18" wheels are a different story...
-
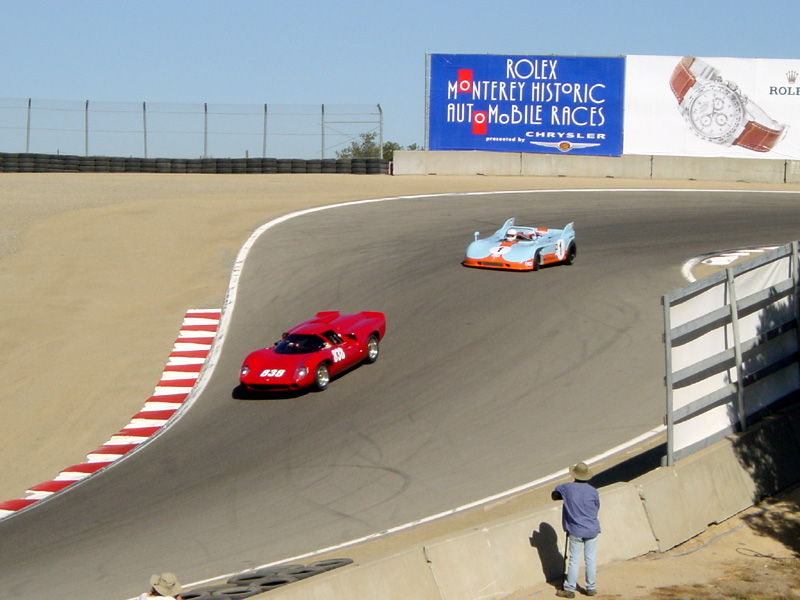
Brian Redman in Bruce Canepa's Porsche 908/3 Spyder about to pass a Lola T-70 in the world famous Laguna Seca corkscrew. Interesting that the 1971 908/3 had a 3.0 liter engine and the Lola's and Ferrari 512's in the race 5.8 liter and 5.0 liter engines. Redman finished first in the 1963-1974 FIA Prototypes & GT Cars Race.

-
P1128 and P1130 point to an intake leak or low fuel pressure (for both engine banks. P1125 points to fuel pressure to high or EVAP canister leaking. Very odd to have too high and too low together. The obvious things are: look for an air leak (loose or cracked hose), change your fuel filter if you have over 30K on it, inspect the EVAP canister. Any changes like BMC or K&N filter? or aftermarket intake?
-
Where is air bleed valve?
Loren replied to my996's topic in 996 Series (Carrera, Carrera 4, Carrera 4S, Targa)
Right next to the cap, lift the handle and turn the wire clip so it stays up. -
If you are asking mdillian3690, then likely not. Tiptronic cars come with a 3rd radiator that is plumbed to the transmission for cooling not the engine. If you want to see how to install it click on the link at the top of the forum for Loren's DIY pages and choose 3rd Radiator Install.
-
Need reverse lookup, part# 996.573.045.01
Loren replied to jonathan's topic in 996 Series Part Number Requests
In the future, it is really a great deal easier for us if you give model and year of your car. Perhaps it is the fuel cooler (996 573 069 01) - item 1?