Welcome to RennTech.org Community, Guest
There are many great features available to you once you register at RennTech.org
You are free to view posts here, but you must log in to reply to existing posts, or to start your own new topic. Like most online communities, there are costs involved to maintain a site like this - so we encourage our members to subscribe or donate. All subscriptions and donations go to the costs operating and maintaining this site. We prefer that guests take part in our community and we offer a lot in return to those willing to join our corner of the Porsche world. This site is 99 percent member supported (less than 1 percent comes from advertising) - so please consider an annual subscription or donation to keep this site running.
Here are some of the features available - once you subscribe RennTech.org
- View Classified Ads
- DIY Tutorials
- Porsche TSB Listings (limited)
- VIN Decoder
- Special Offers
- Paint Codes
- Registry
- Videos System
- View Reviews
- and get rid of this welcome message
It takes just a few minutes to register, and it's quality Porsche information at a low cost.
Contributing Members also get these additional benefits:
(you become a Contributing Member by subscribing or donating money to the operation of this site)
- No ads - advertisements are removed
- Access the Contributors Only Forum
- Contributing Members Only Downloads
- Send attachments with PMs
- All image/file storage limits are substantially increased for all Contributing Members
- Option Codes Lookup
- VIN Option Lookups (limited)

-0001-0001.png.112c13ee97acfad0cb1e70d195cc9a0e.png)
Loren
-
Posts
37,902 -
Joined
-
Days Won
651
Content Type
Profiles
Events
Forums
Exterior Paint Colors
Downloads
Tutorials
Links Directory
Collections
Classifieds
Store
Everything posted by Loren
-
Correct. The mufflers don't change only the tips.
-
-0001-0001.thumb.png.17f5bb25bf8ec261a17c21e6321c8492.png)
997 - Option XRP
Loren replied to dstrimbu's topic in 997-1 Series (Carrera, Carrera 4, Carrera 2S, Carrera 4S)
Some options are easy to retrofit - so you can always add them later (like spacers). Other options require a different wiring harness or other major "production" changes. For example: you don't want to retrofit a leather dash or heated seats - one requires complete dash removal and the other requires major wiring harness controller changes. My advice would be to concentrate on the options that are not easily retrofit and make sure you get difficult (or very expensive retrofit) options on your factory build. -
No difference for a C4S. There were several PSE iterations from late 1999 until present. With the introduction of the 3.6 liter engine in MY02 they went with larger bore bypass pipes. Porsche says not to use the early small bore type on 3.6 liter cars. The later model will fit and work fine on ANY model year 996. You use original tailpipes so the fit to the later model bumper or C4S bumper does not change.
-
Let there be light
Loren replied to gcp's topic in 996 Series (Carrera, Carrera 4, Carrera 4S, Targa)
There isn't a specific fuse for that light. It is part of the alarm circuit so if the fuse were out then your door lights, engine compartment light, reading light. etc. would not work also. The other possibility is that the microswitch on the front hood latch is not functioning. -
Boxster is back from the dealer
Loren replied to number9ine's topic in 986 Series (Boxster, Boxster S)
That is a cover (plug) on the end of the camshaft cover. It was likely leaking or damaged. I would also look for any vacuum/intake leaks as they may have knocked a hose off (or forgotten to re-attach it). -
996 key cover needed
Loren replied to johnp77777's topic in 996 Series (Carrera, Carrera 4, Carrera 4S, Targa)
Or... you could just read the Porsche TSB 1/05 9662 Design Key (dated Jul 29, 2005) in the TSB section... ;) -
Problem with Window
Loren replied to Jorge332655's topic in 996 Series (Carrera, Carrera 4, Carrera 4S, Targa)
That condition should trigger an open alarm sensor when read with a PST2. If you can find a shop (or racer, or private individual) with a PST2 (or PIWIS) tester it should be a fairly easy diagnosis. Where are you located? -
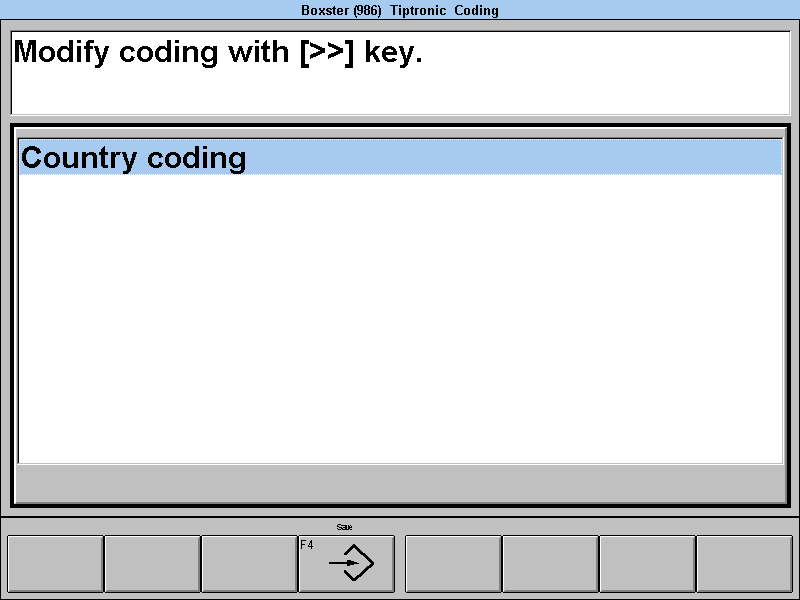
On the early Tiptronic's I think the only thing you program (with a PST2) is the country code. Where are you located?

-
Problem with Window
Loren replied to Jorge332655's topic in 996 Series (Carrera, Carrera 4, Carrera 4S, Targa)
Could be the switch on the door handle (inside the door). Try lifting and releasing the door handle - the window should drop about about 1/2 inch and then go back up when released. -
01 C2 Cab - Canadian Car
Loren replied to 911porschefan's topic in 996 Series (Carrera, Carrera 4, Carrera 4S, Targa)
It is a double relay in positions 6 and 7 (second row from the top first and second relay from the left). It should have part number 996 615 11 00. -
Problem with Window
Loren replied to Jorge332655's topic in 996 Series (Carrera, Carrera 4, Carrera 4S, Targa)
Sounds like the door may have lost power. Have you checked fuse C3 (third row down - third fuse from the left)? If that is okay, then see if that door locks with the dash power lock switch. Also, does the power windows switch for that side move the window up and down? -
01 C2 Cab - Canadian Car
Loren replied to 911porschefan's topic in 996 Series (Carrera, Carrera 4, Carrera 4S, Targa)
Canada requires DRLs for vehicles made after December 1, 1989. Have you checked the fuses and the DRL relay? -
Engine skid plate
Loren replied to wrljet's topic in 996 Series (Carrera, Carrera 4, Carrera 4S, Targa)
It is an RoW part - so you will need to find a dealer that can get it from Europe. The US retail price was $110.70 (as of Oct 2005). -
Carrera (997) and TT/GT2 Maintenance Checklists have been added to the Maintenance Checklists section.
-
Engine skid plate
Loren replied to wrljet's topic in 996 Series (Carrera, Carrera 4, Carrera 4S, Targa)
Stainless steel vs the soft magnesium aluminum alloy of the engine case. I've heard it does a good job. It really for low driveways, backing into curbs, or other obstructions. I don't think it was intended for off-road racing. -
Engine skid plate
Loren replied to wrljet's topic in 996 Series (Carrera, Carrera 4, Carrera 4S, Targa)
http://www.renntech.org/forums/index.php?showtopic=3525 http://www.renntech.org/forums/index.php?showtopic=2186 http://www.renntech.org/forums/index.php?showtopic=1441 -
Need a DIY for brake pads
Loren replied to Unfrozen Caveman Lawyer's topic in 986 Series (Boxster, Boxster S)
The Carrera DIY here is pretty much the same for a Boxster (or TT, or GT3 for that matter). Check with a dealer/parts supply house for the latest part numbers and prices. -
That is not uncommon at all. The DME will log events that are pending codes as well as triggering codes. Either can be cleared if the condition that caused the code is corrected. This is done in a certain number of drive cycles depending on the code. That is why a loose gas cap CEL will eventually clear itself (assuming you tighten the gas cap). Yes, the PST2 can record screen data and readings. The tech has to push a "save" button on each screen they want to record in the PST2 log. Then they have to print the log. In some cases (specifically warranty work that is requesting reimbursement) Porsche requires the log be sent in. Here is an (very short) example log: PST2_log.pdf
-
Engine skid plate
Loren replied to wrljet's topic in 996 Series (Carrera, Carrera 4, Carrera 4S, Targa)
Yes this is a factory piece. -
Install a factory Sat Nav
Loren replied to Spaniard's topic in 996 Series (Carrera, Carrera 4, Carrera 4S, Targa)
I guess I'll be skipping this upgrade... Thanks for the infor Loren. Shop around - especially at Sunset Imports. The price I quoted is List Price - and you can get it for less than that. -
Does anyone have the Tequip Shifter Part Number?
Loren replied to Gator996's topic in 996 Series Part Number Requests
The only difference (that I know of) in the early and later Tequipment shifter knobs was that the early ones had the Porsche logo in black and the later ones had it in color. 996 424 981 01 S30 Light maple rootwood/aluminum shift knob -- retail $375.00 (as of Oct 2005) 996 424 981 16 S30 Light maple rootwood/aluminum shift knob -- retail $434.27 -
Cayenne Maintenance Checklists have been added to the Maintenance Checklists section.
-
Yes, it is worldwide. Previously they spec'ed Mobil 1 15W-50. But they took that off the list a couple years ago.
-
Fuse Question
Loren replied to cgreene's topic in 9PA, 9PA1 (Cayenne, Cayenne S, Cayenne Turbo, Cayenne Turbo S)
Looks like they are on the seat fuses Left 44 and Left 45. It would seem that only one side would be out at a time though? -
Yes, that is the lift point I use. It is as close to a frame member as you are going to find. What bears the weight when you get a little airborne going over a hill? and when the car lands? I guess I would say the same cross member. If you don't feel comfortable lifting the car there, or at the engine, then I don't know where you can lift it at.